

Quick Start
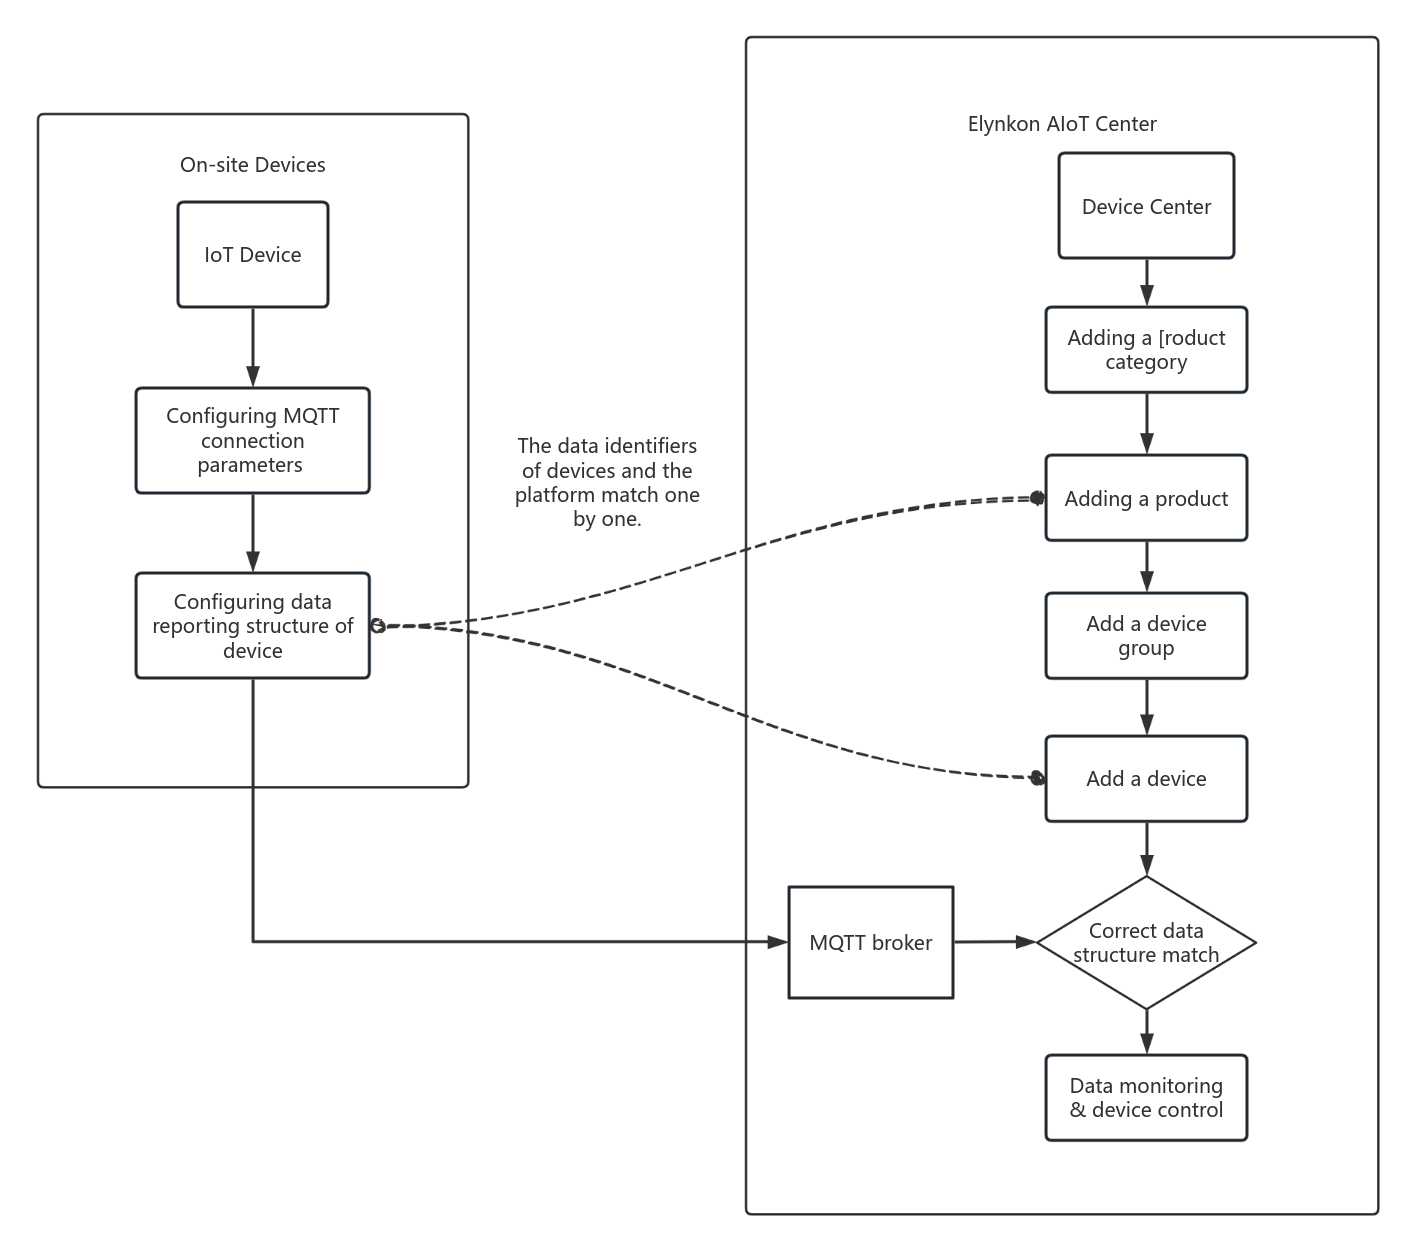
General Operation Flowchart
Creating Product Categories
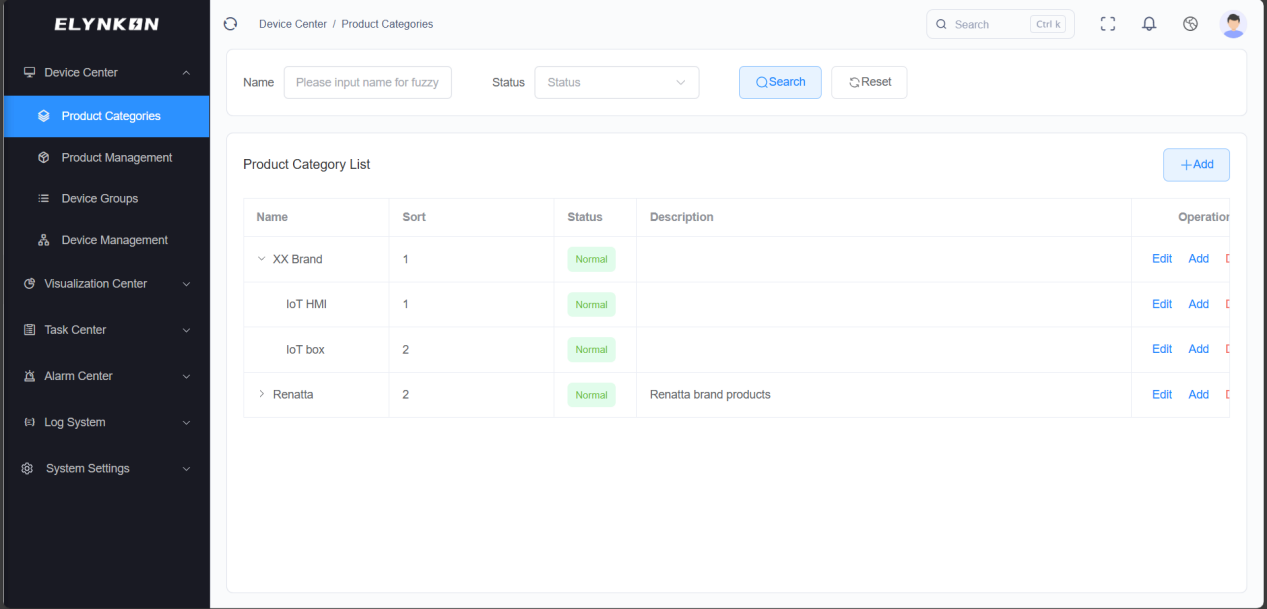
Adding a new product categories.
You can add the main category of the corresponding manufacturer, as well as the subcategory corresponding to the product series under this main category.
In this example, we added "IoT HMI" under the "Renatta" category.
For more detailed information, refer to Section 3. Product Categories.
Creating a Product
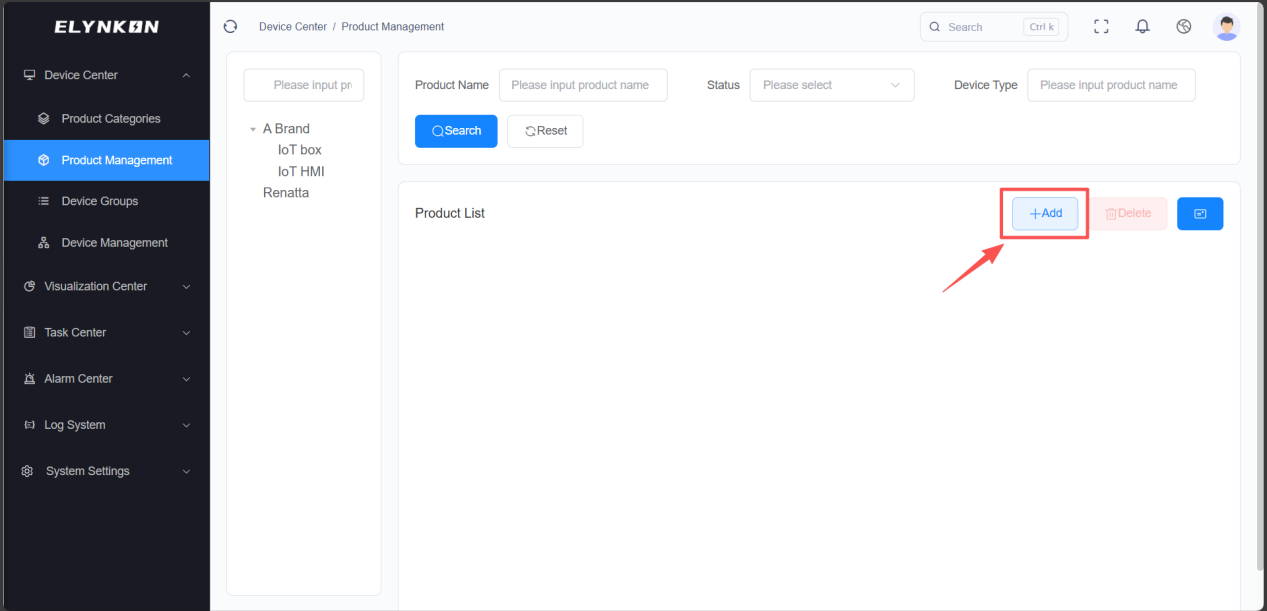
Adding a New Product
You can click the "+" button in the Device Management module to add a product.
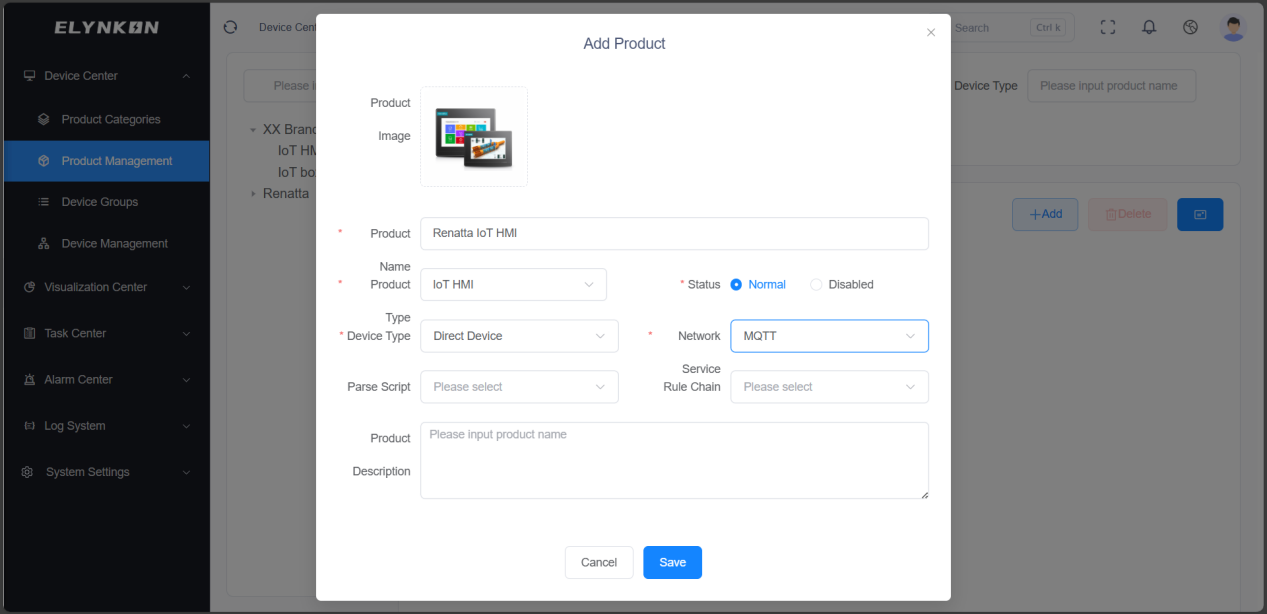
Items marked with "*" are all required fields. For example, we can enter "Renatta IoT HMI" as the product name, and select the previously created "Renatta"-"IoT HMI" for the product category. We take direct-connected devices as an example. The device will connect to the platform via the MQTT protocol.
Configuring Thing Model
After the product is created, click the "Detail" button to configure the Thing Model of the product.
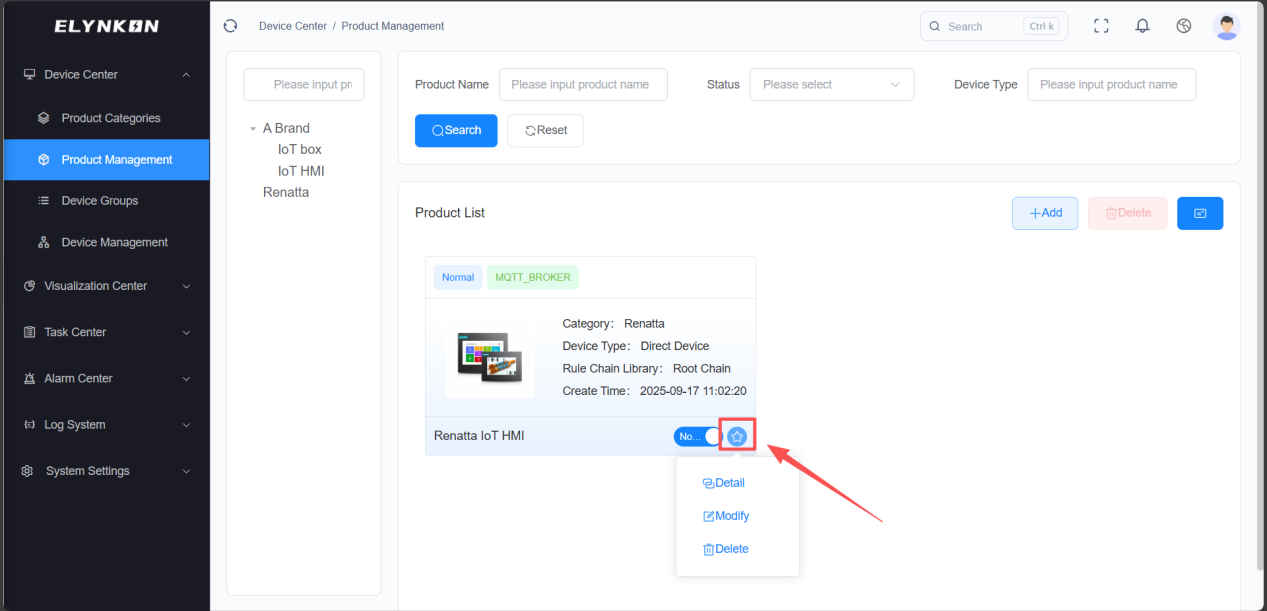
We will take adding the two function types "telemetry" and "command" as examples to explain.
Adding Telemetry Parameters
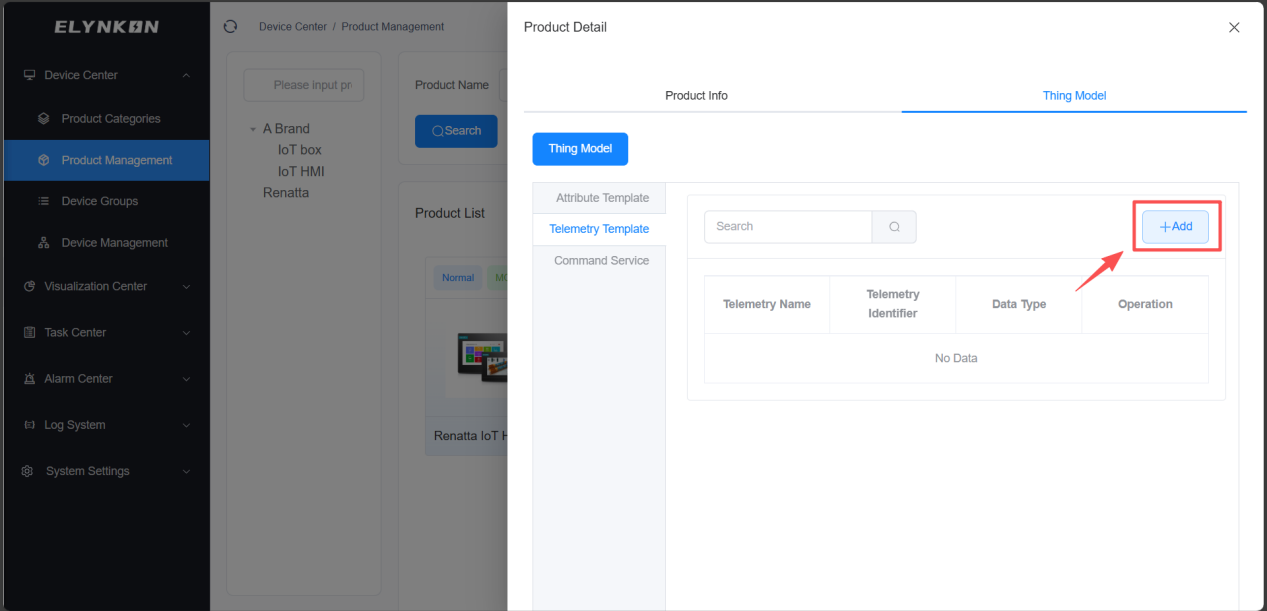
If you need to monitor the data detected by on-site devices in real time, you can add parameters to the telemetry template. Choose "Telemetry Template" tab and click the "+Add" button to add parameter.
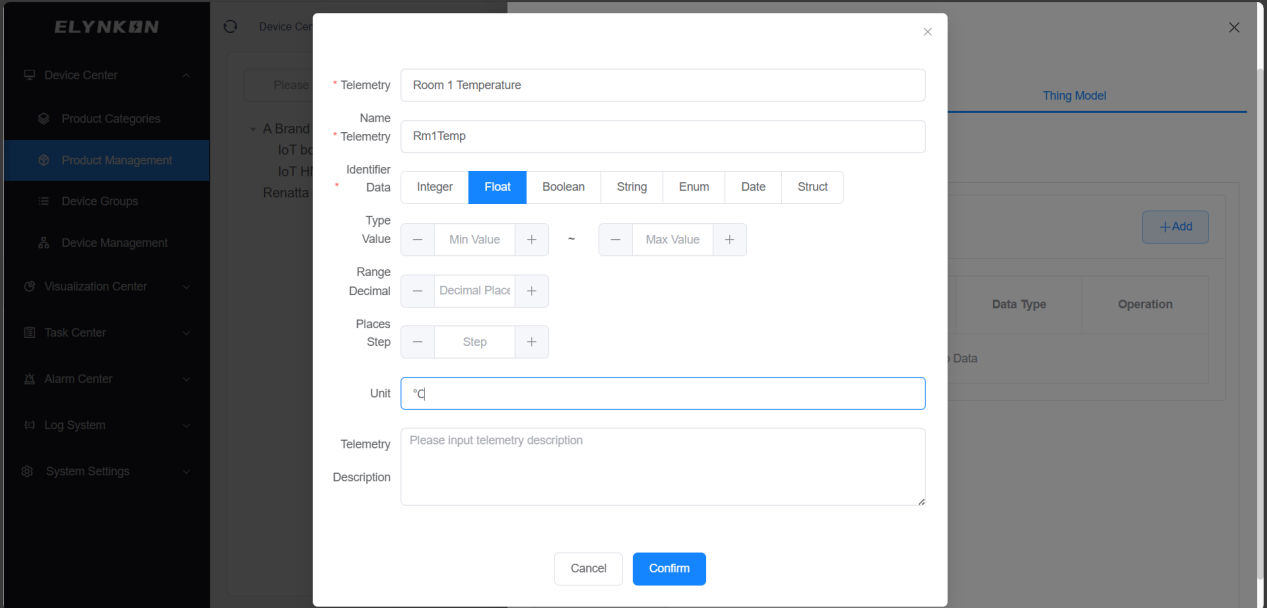
Enter the telemetry name and telemetry identifier. Select the data type. For example, If we want to obtain the temperature of Room 1 detected by on-site devices, the telemetry name can be "Room 1 Temperature" and the telemetry identifier can be "Rm1Temp". Set the data type to float, and you can configure the display unit "℃" for this data.
Adding Command Service
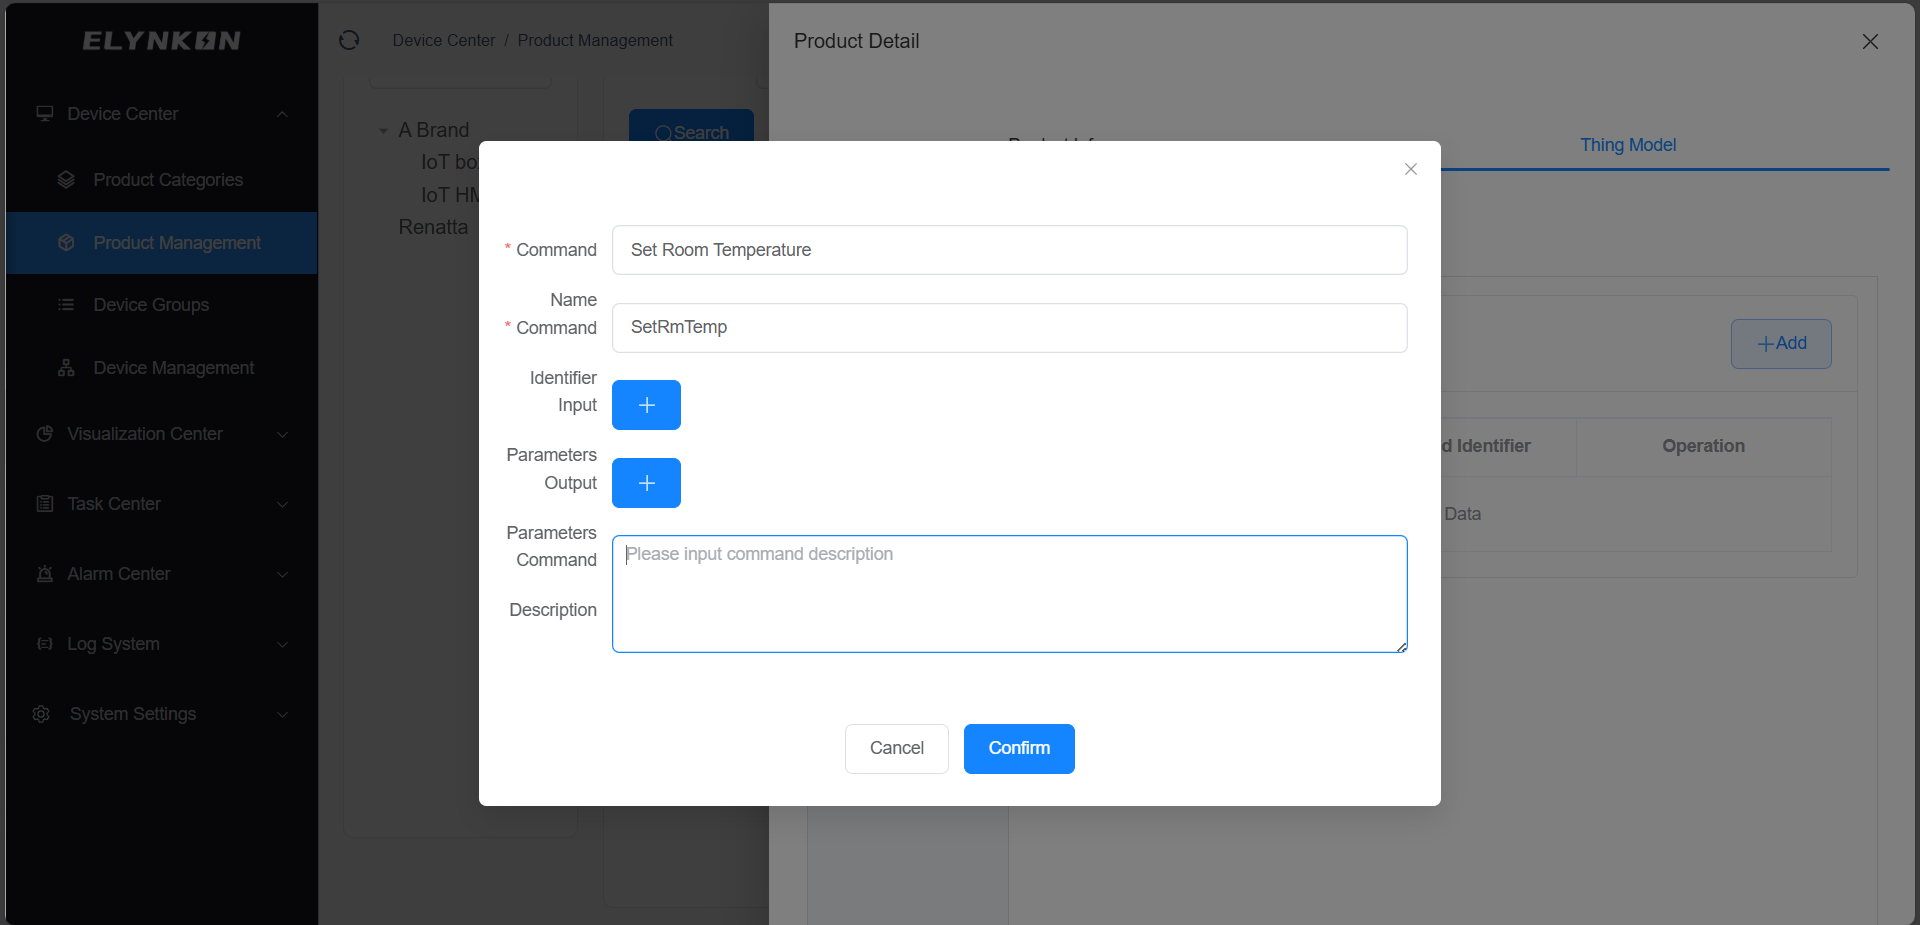
If you need to control on-site devices or modify their data, you can add a Command in the Command Service. Choose "Command Service" tab and click the "+Add" button to add commands.
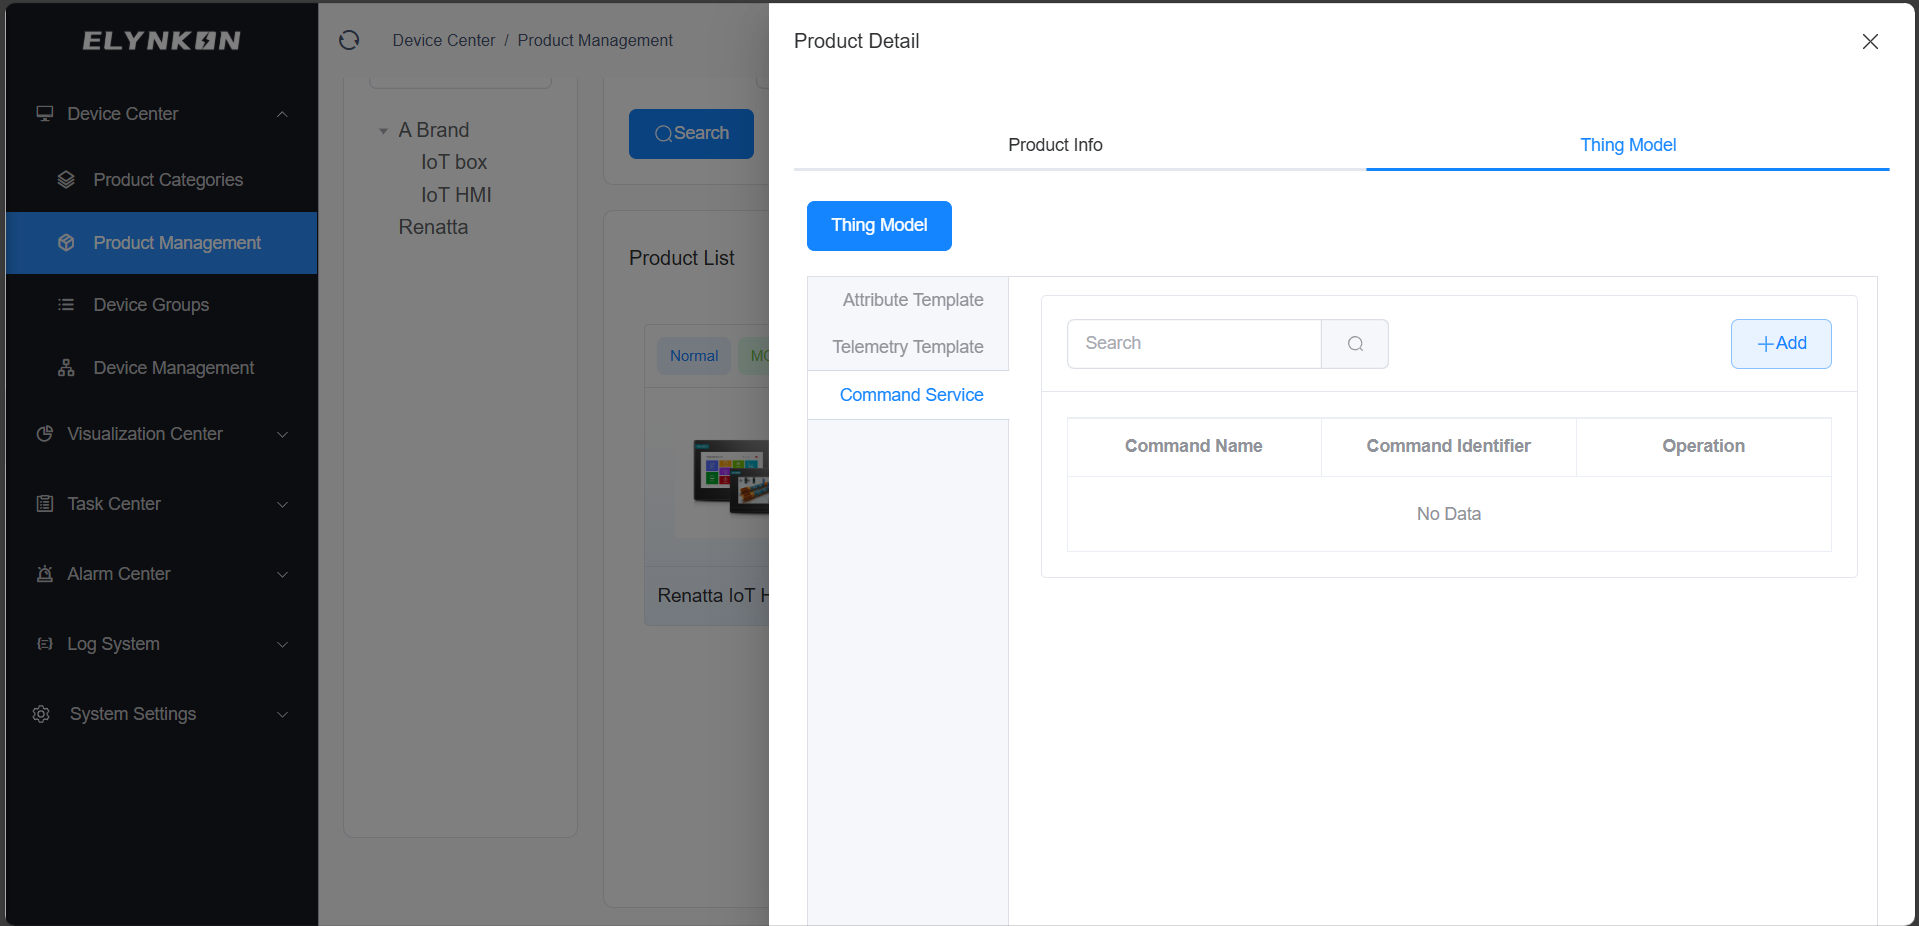
Enter the command name and command identifier. For example, if we need to modify the room set temperature of on-site devices, the command name can be set to "Set Room Temperature" and the command identifier can be set to "SetRmTemp".
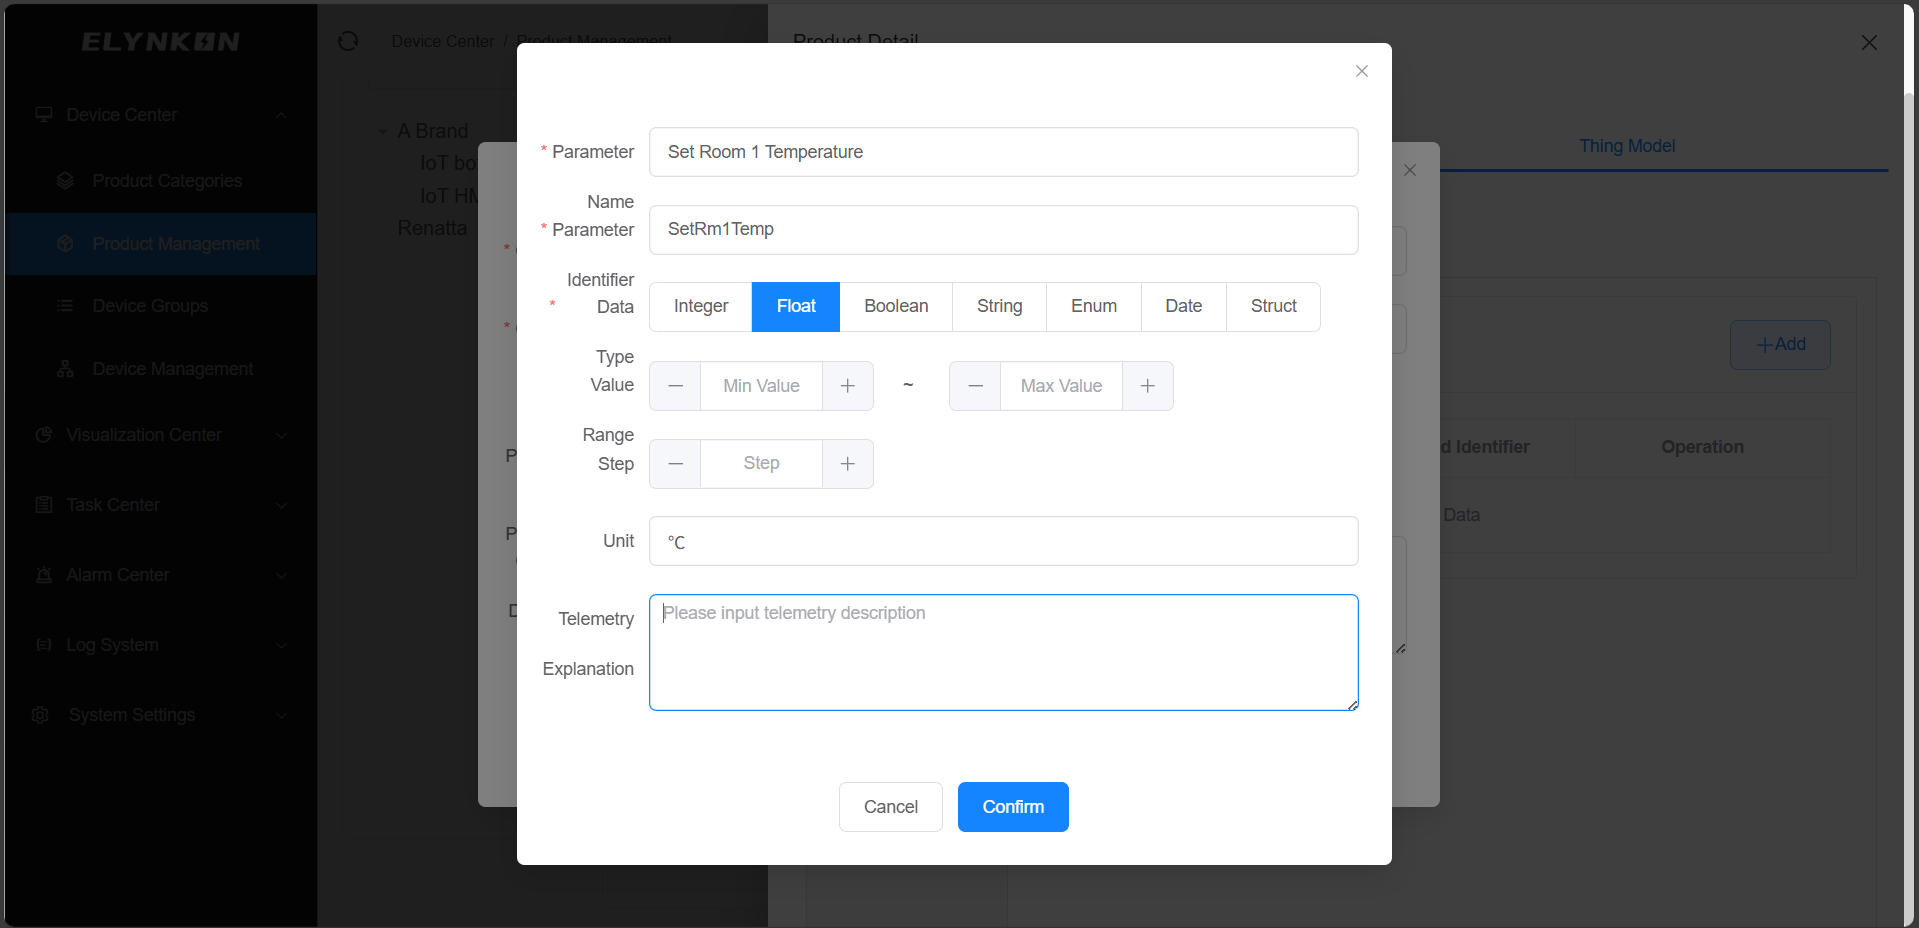
Click the "+" button for input parameters to add the parameters to be written to the device. For example, when you need to modify the set temperature of Room 1, the parameter name can be set to "Set Room 1 Temperature", the parameter identifier can be set to "SetRm1Temp", select float type for the data type, and the display unit can be set to "℃".
TIP
* You can add multiple input parameters at the same time. You can also add the set temperatures for Room 2, Room 3, etc., in this Command Service to control the temperatures of multiple rooms at the same time.
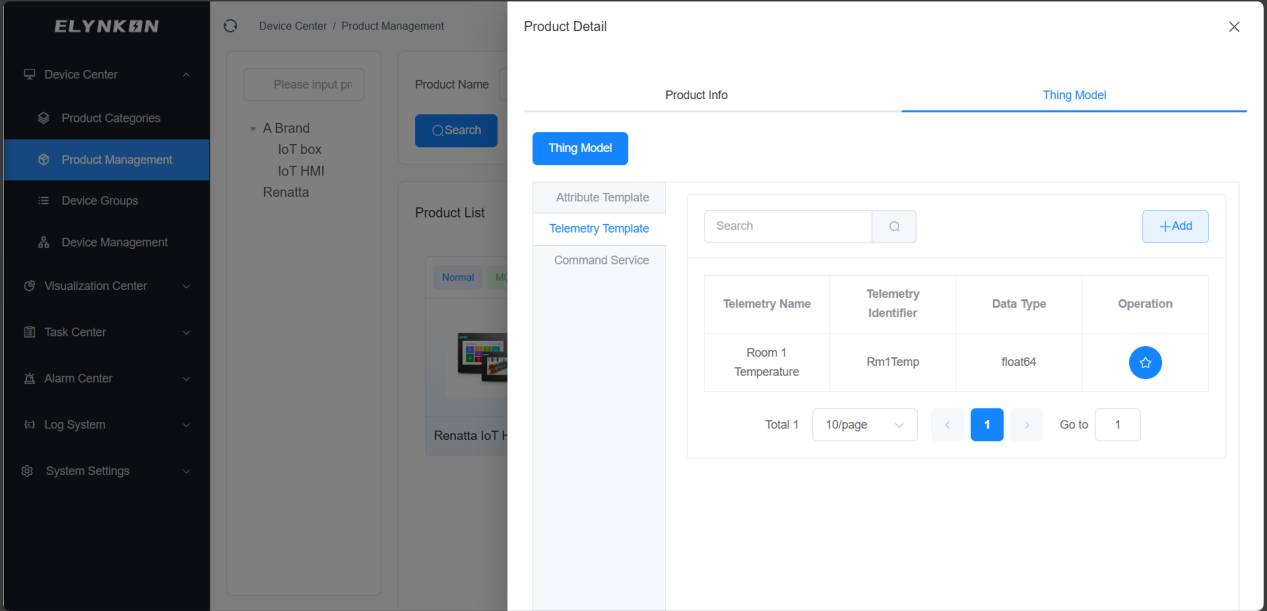
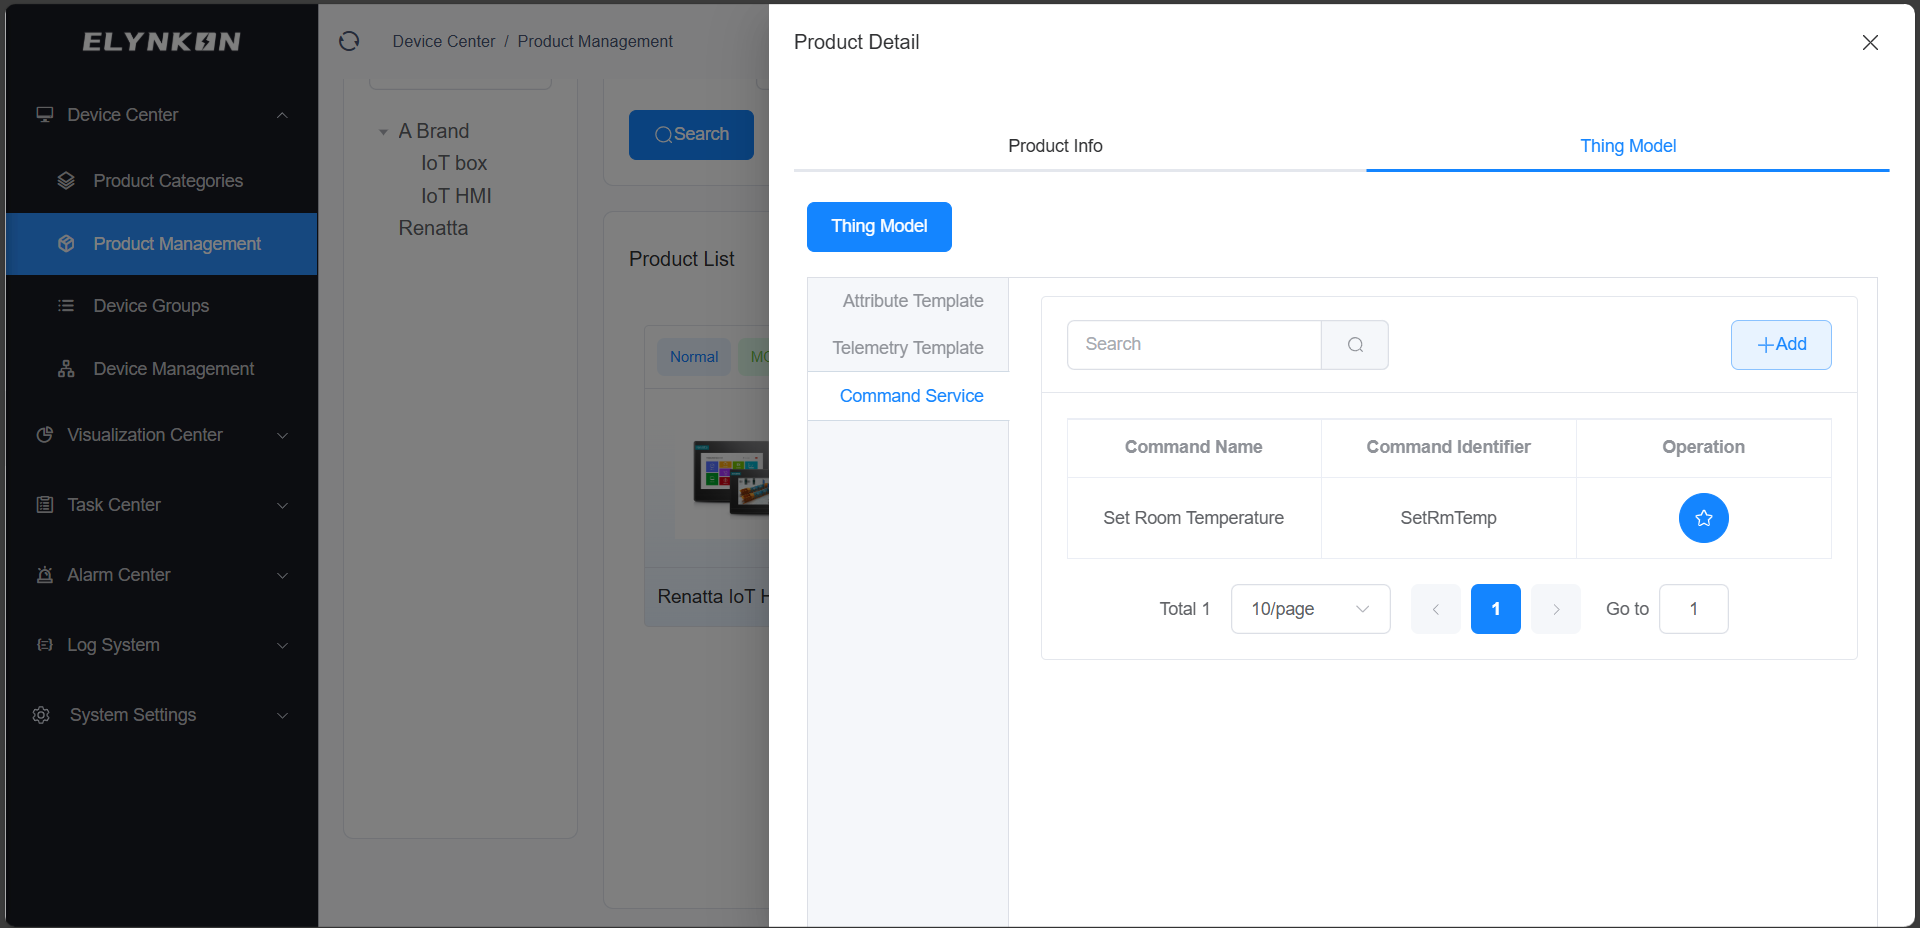
After completing the above operations, telemetry parameter and command will be displayed in the table of the "Telemetry Template" and "Command Service" tab.
For more detailed information, refer to Section 4. Product Management.
Creating Device Groups
Adding a new device group.
Devices can be grouped based on actual project requirements such as device installation area, device type, and functional purpose.
For example, when configuring for the XX Building project, devices can be grouped by installation area: set the main group as "XX Building" and create subgroups for each floor separately (e.g., Level 1, Level 2, etc.).
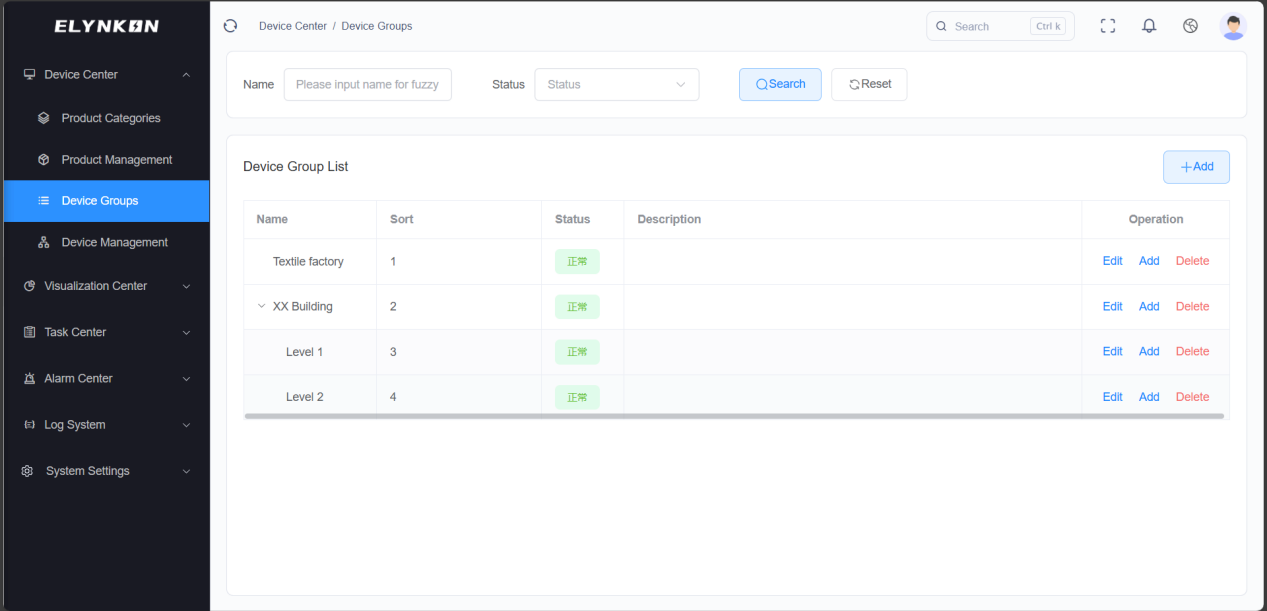
For more detailed information, refer to Section 5. Device Groups.
Creating a Device
In the Device Management module, Click the "+Add" button to add device.
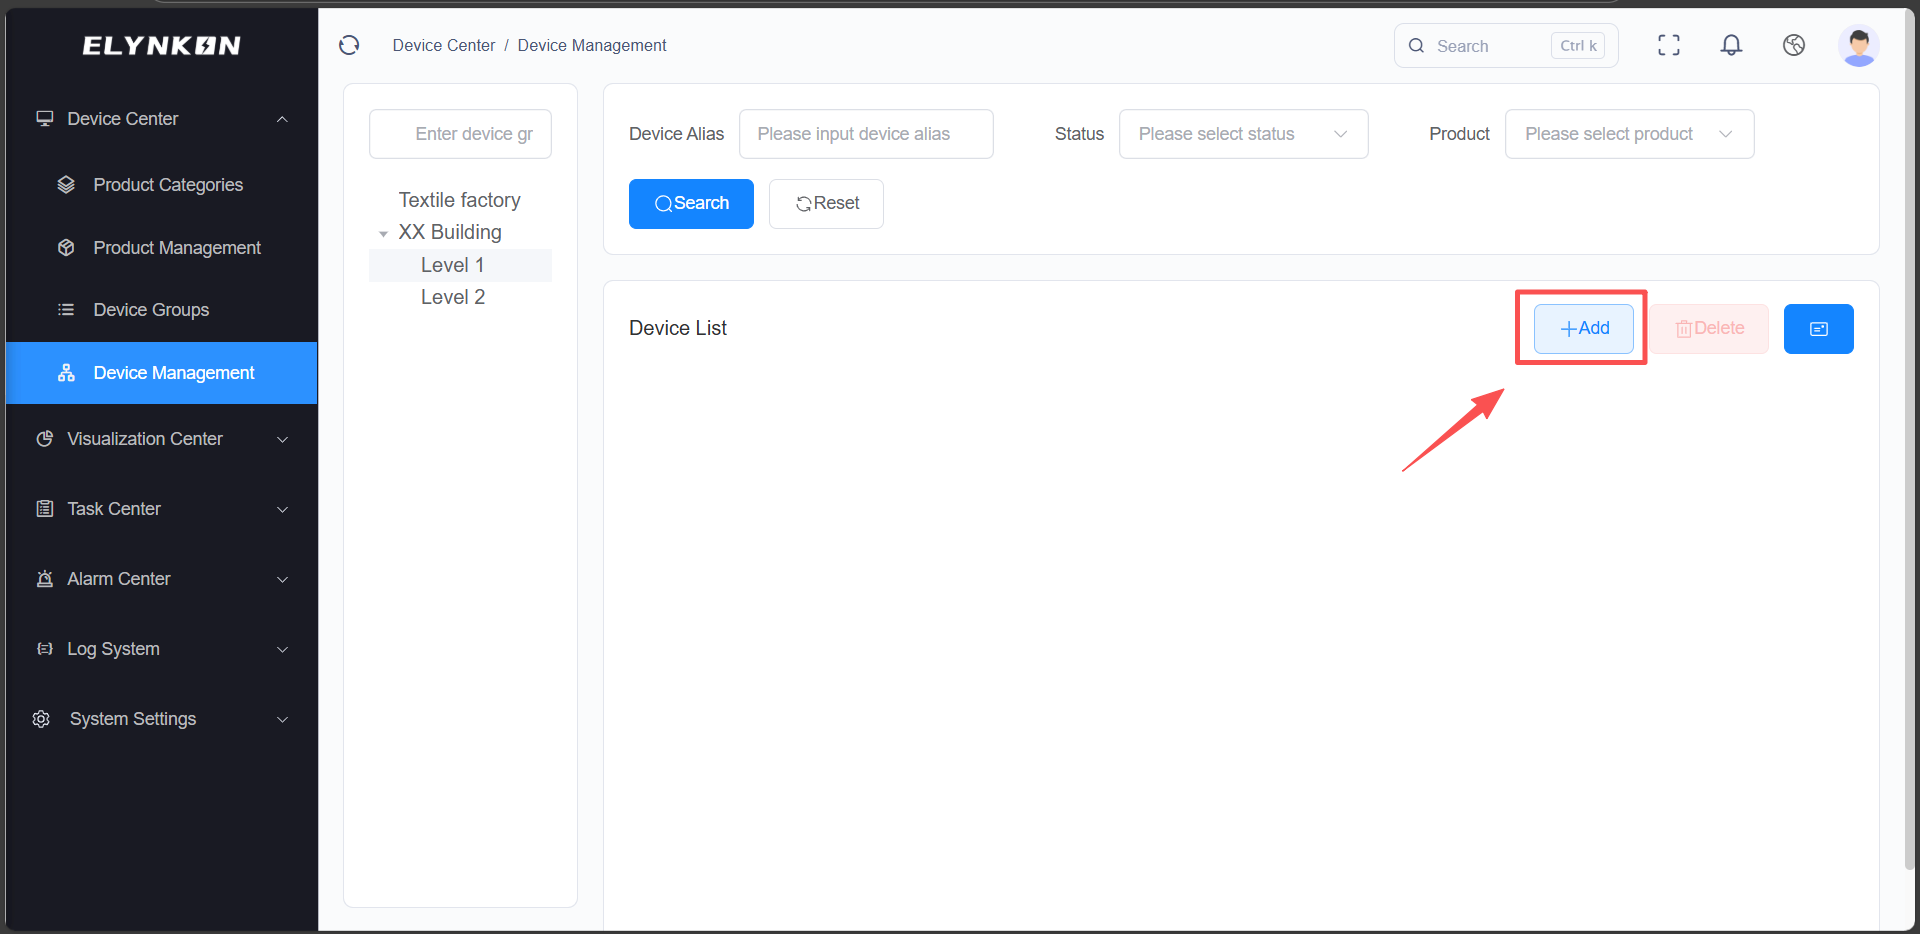
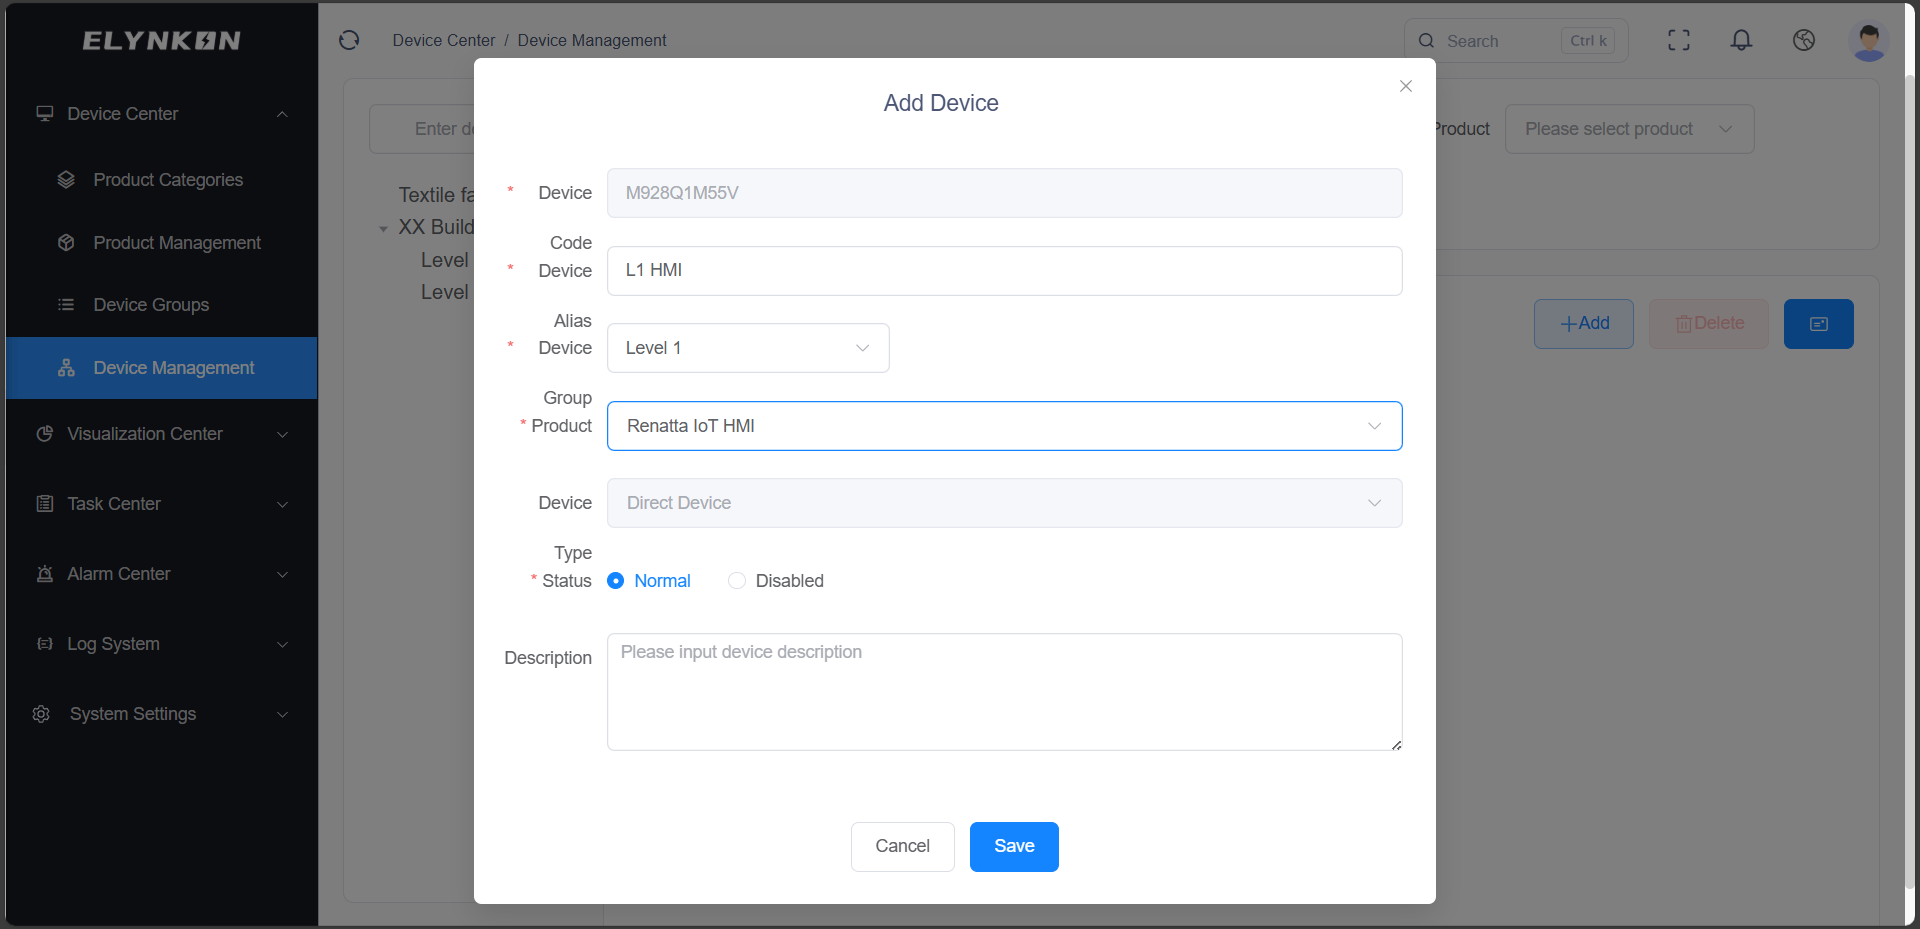
For example, based on project requirements, you can name the HMI devices on the 1st Floor of "XX Building" as "L1 HMI", select "XX Building - Level 1" as the device group, and choose the previously created "Renatta IoT HMI" as the product. This device will automatically bind to the thing model parameters configured for the product you select.
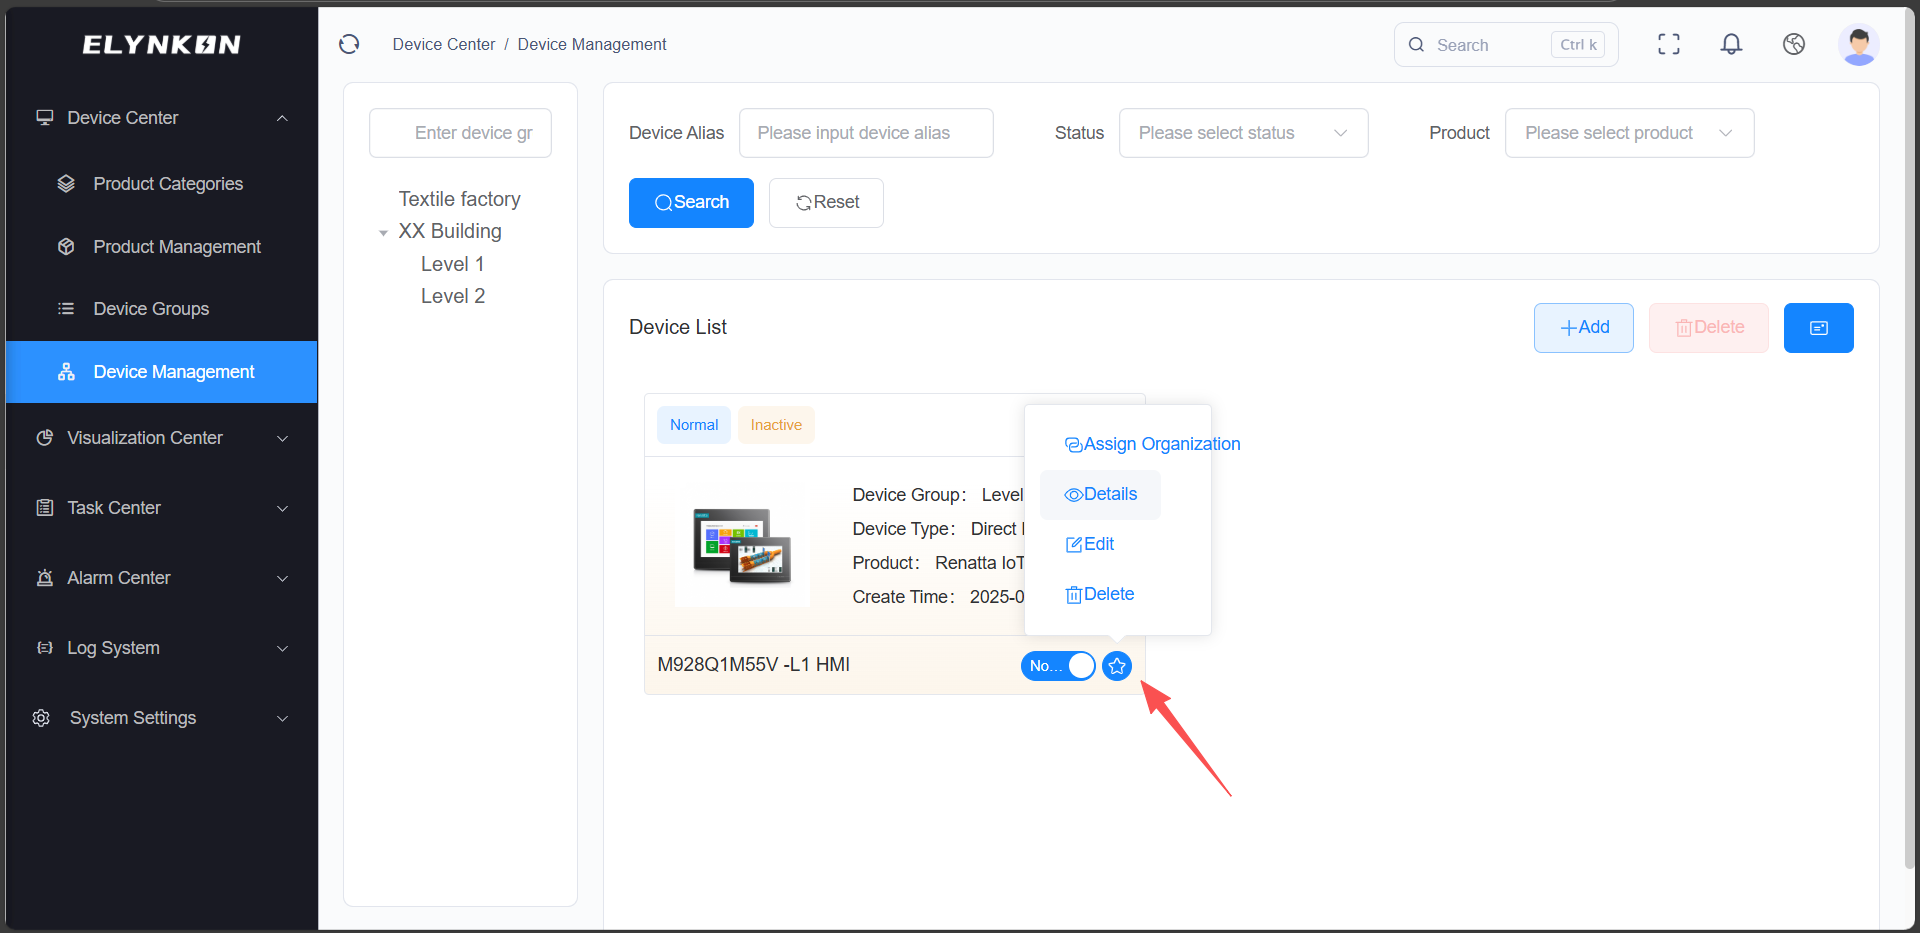
Click "Detail" button to view the device details.
On the TSL tab, you can view the parameters of this device—these parameters are derived from the parameters configured in the product "Renatta IoT HMI" and have been automatically synced to this device. All devices created based on this product will automatically load the same parameters. If you need to add special parameters for a specific device individually, you can click the "+ Add" button on this tab to do so.
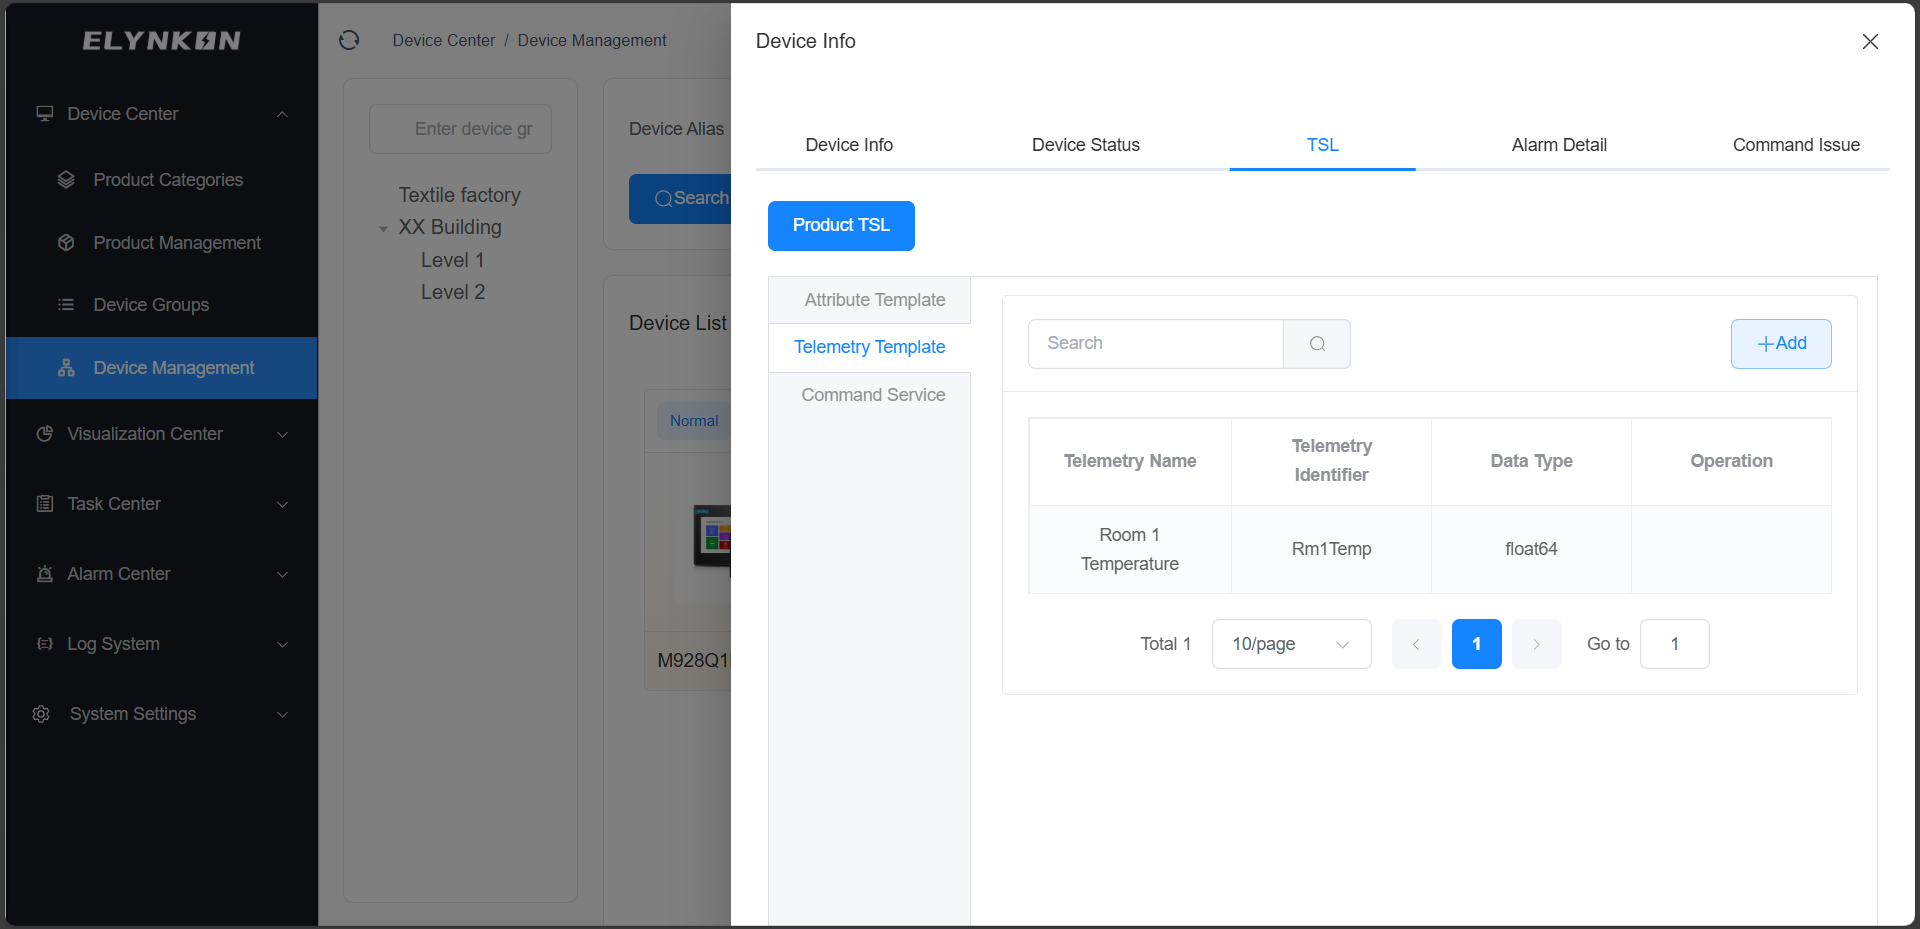
For more detailed information, refer to Section 6. Device Management.
Configuring MQTT Connection of Device
Taking the MQTTX client tool as an example to simulate the connection between an on-site device and the platform.
You can configure the connection parameters according to the following information.
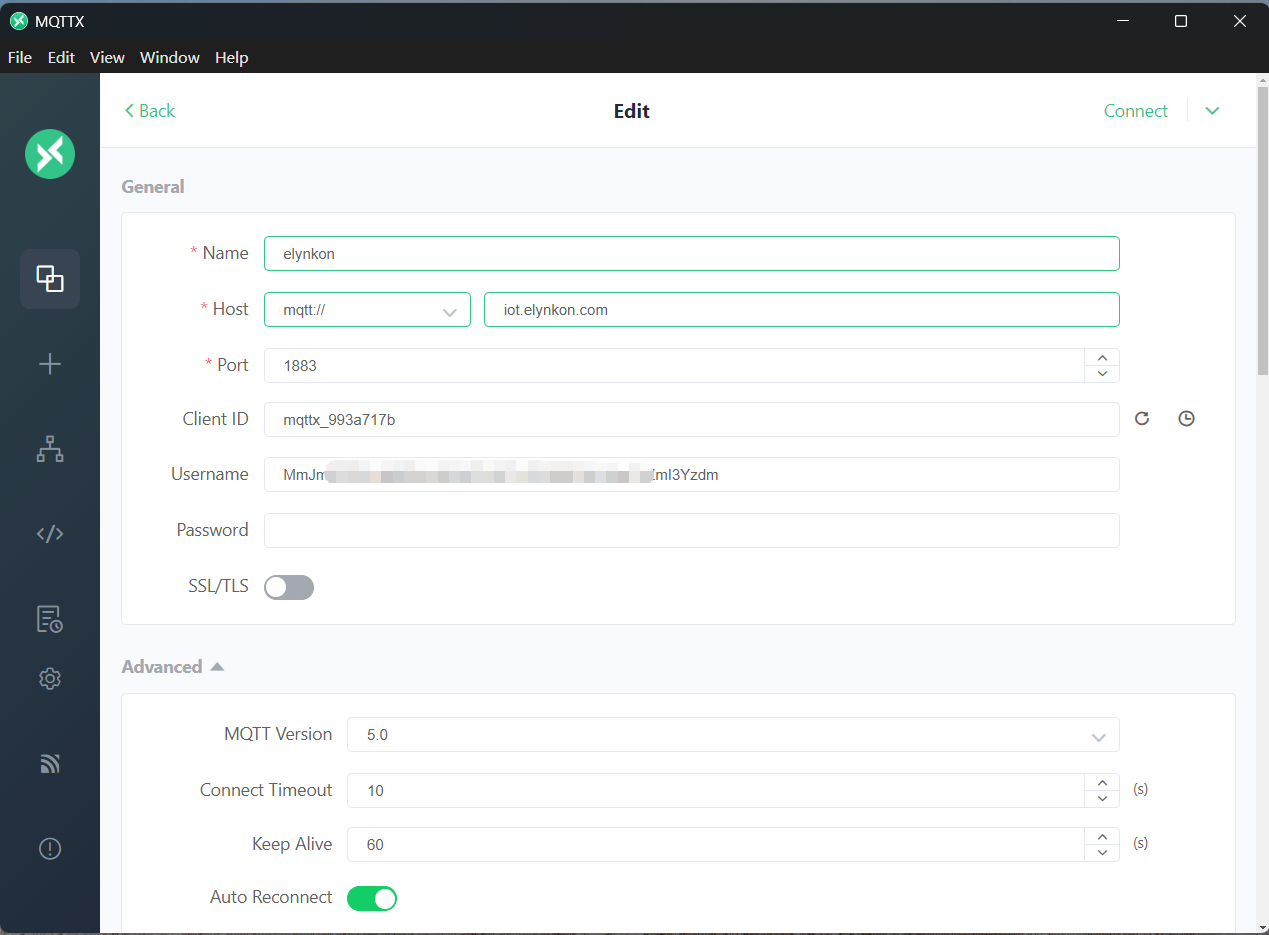
Connection Parameters Description
| Parameter | Filling Instructions |
|---|---|
| Name | Enter any name you prefer |
| Host | "iot.elynkon.com" or your Edge Server IP |
| Port | 1883 |
| Client ID | A randomly generated ID is sufficient. |
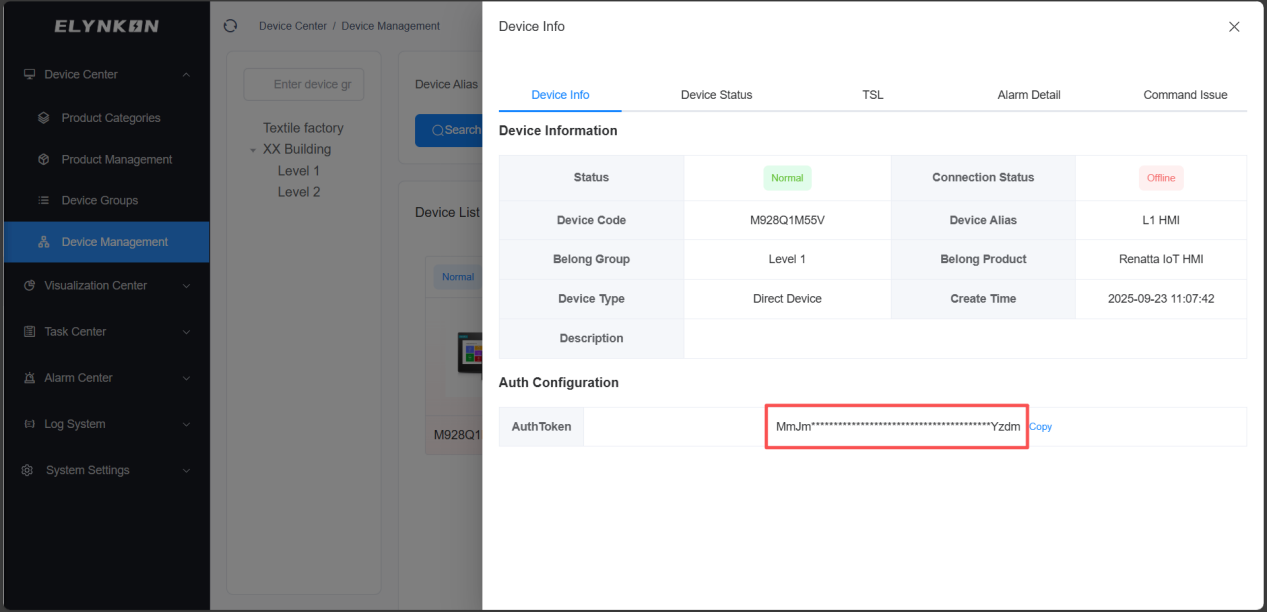
| Username | Platform's AuthToken |
| Password | Leave it blank or enter any password you prefer |
AuthToken can be viewed and copied by accessing the details page of the corresponding device in the Device Management Module under the Platform Device Center.
Configuring MQTT Reporting Data Structure of Device
Reporting data to the platform
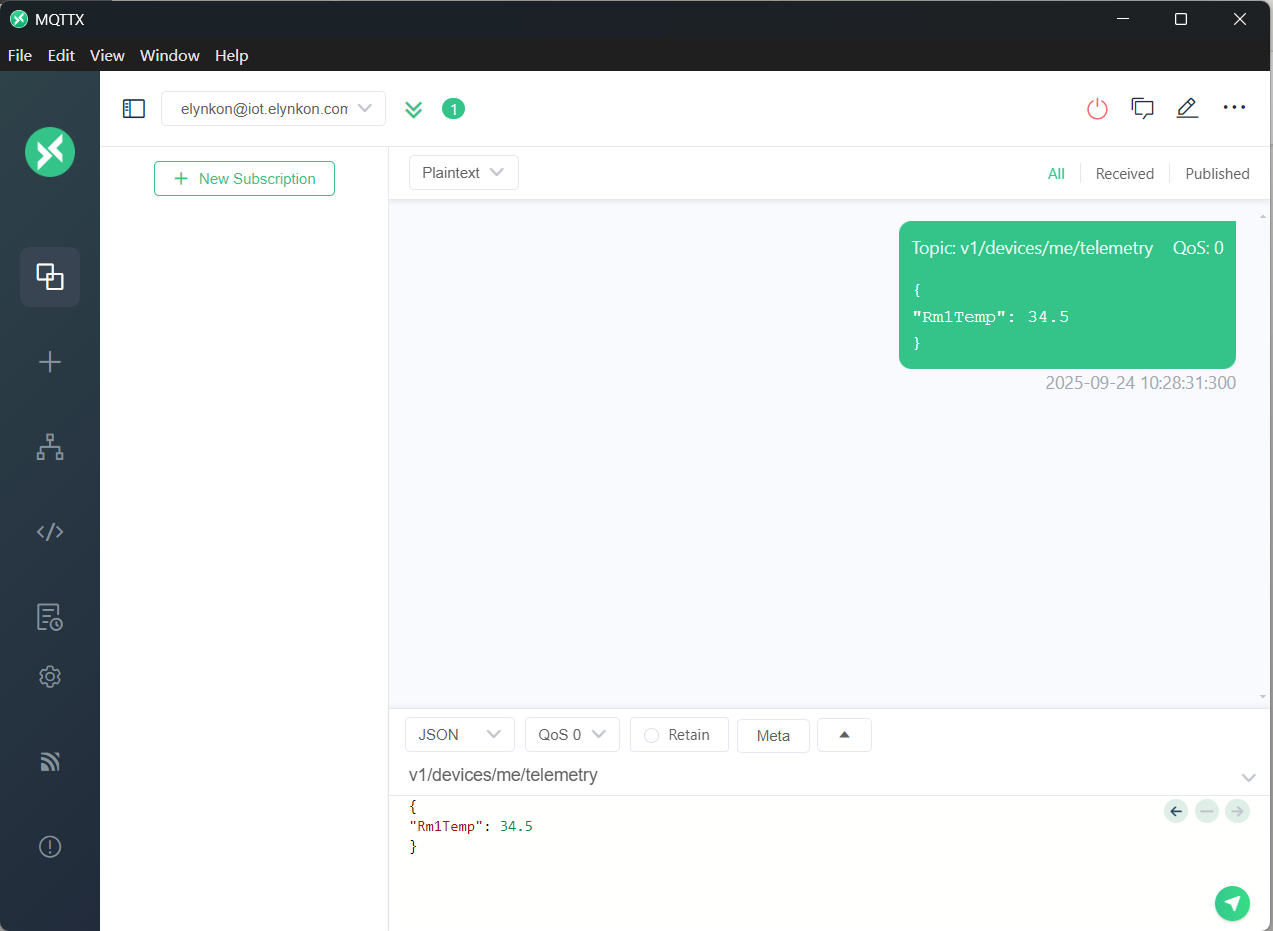
Taking telemetry data as an example, the Topic "v1/devices/me/telemetry" can be used to report data.
On the platform's device TSL, telemetry parameter with the telemetry identifier "Rm1Temp" has been created in the previous steps.
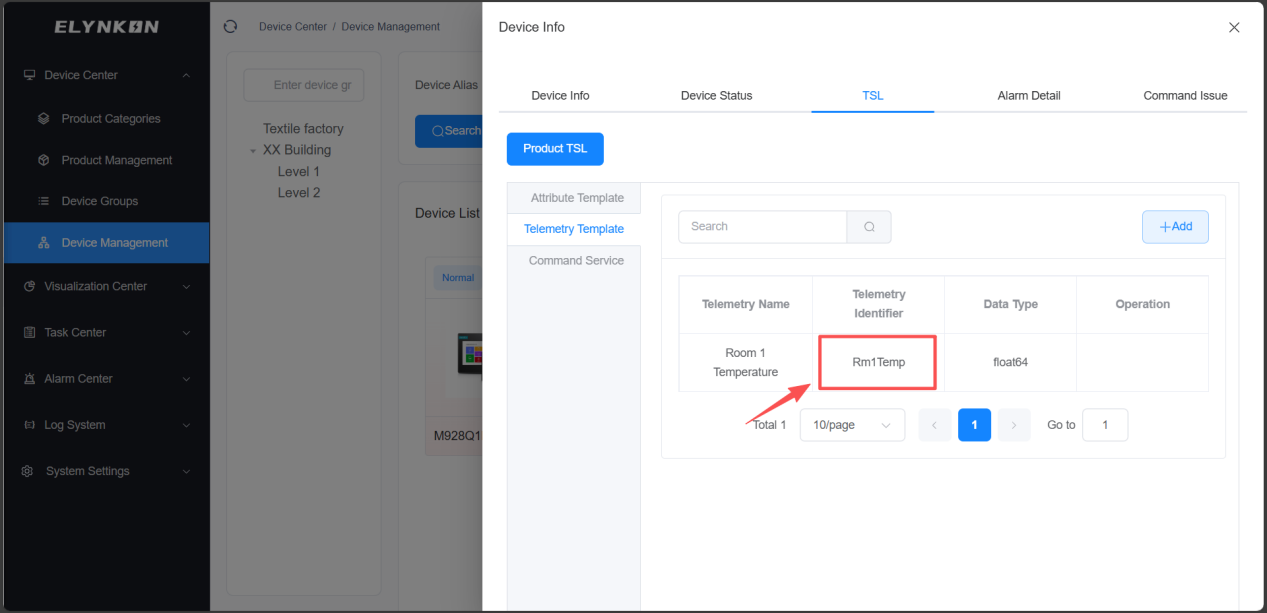
Its data reporting structure will be:
v1/devices/me/telemetry{
"Rm1Temp": value1
}Data can be published via MQTTX based on this Topic and data structure to complete data reporting.
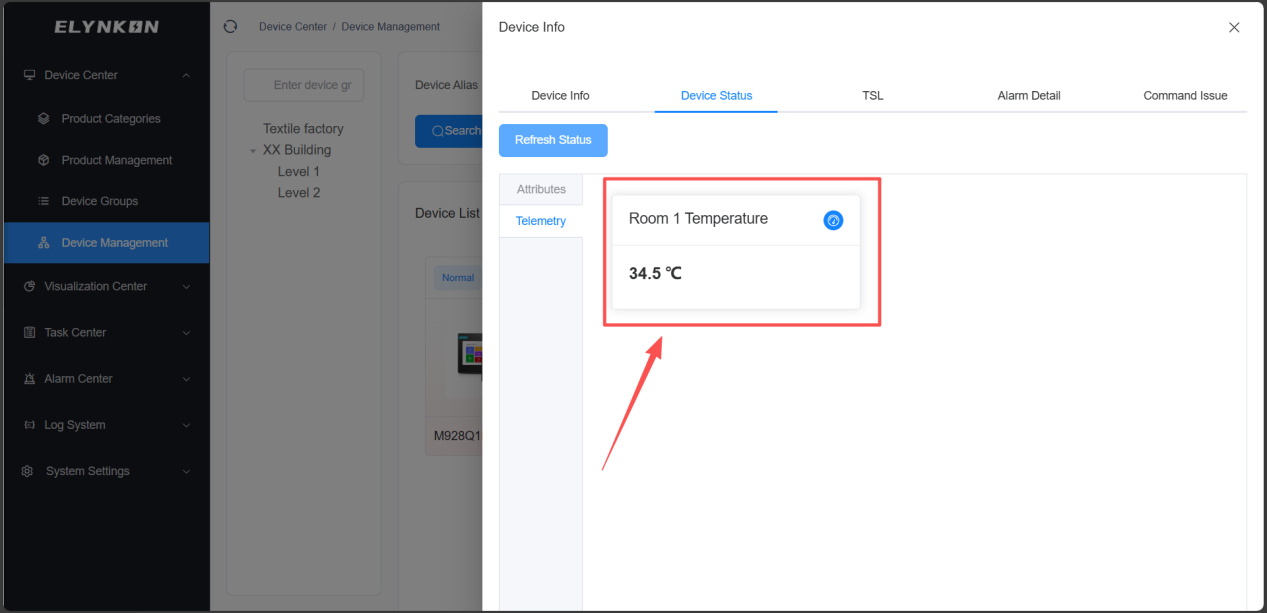
On the Platform's Device Status Page, you can view that the platform has successfully received the data reported by the on-site device.
Controlling the on-site device
The platform can control on-site devices with Command Service.
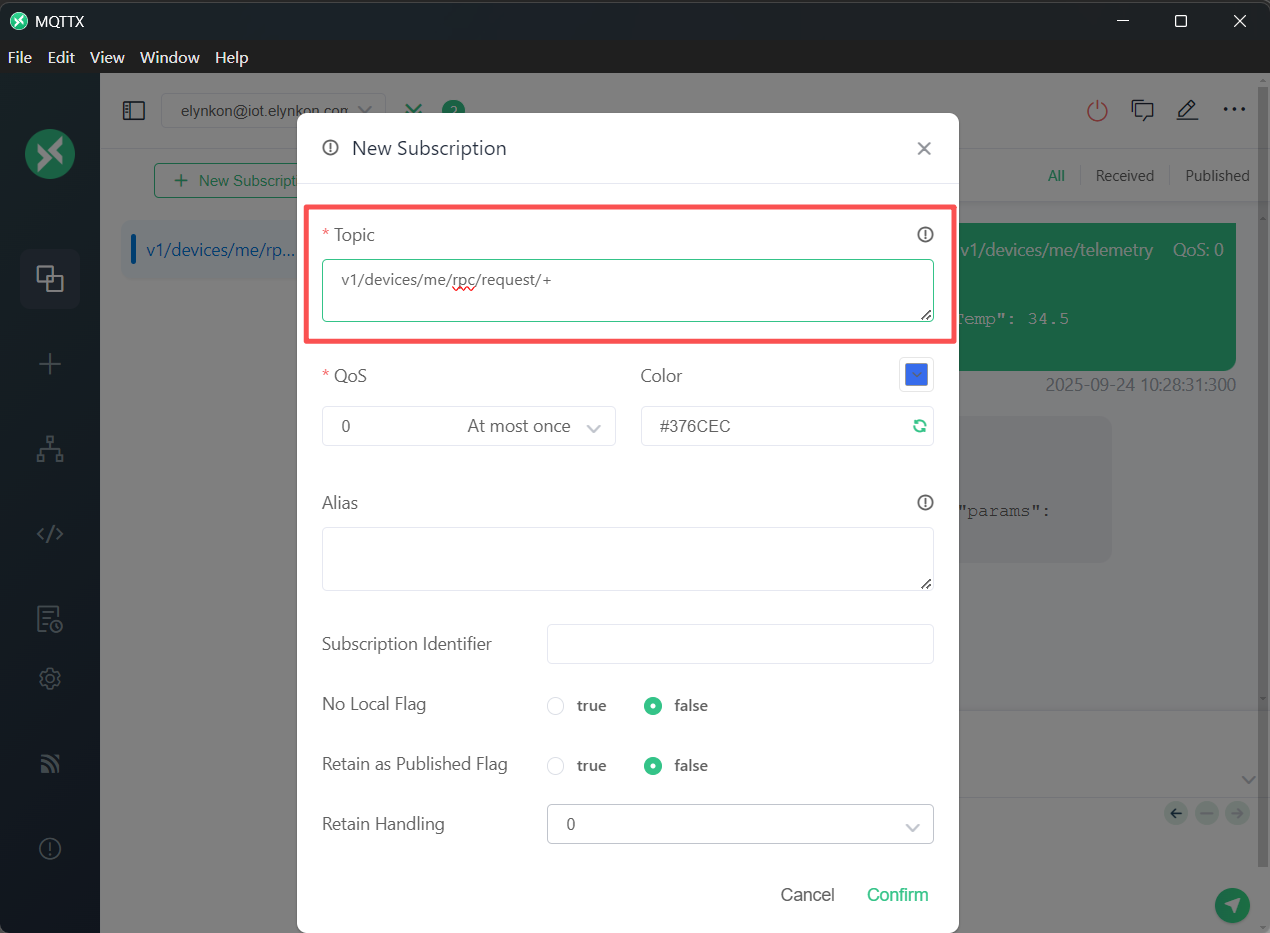
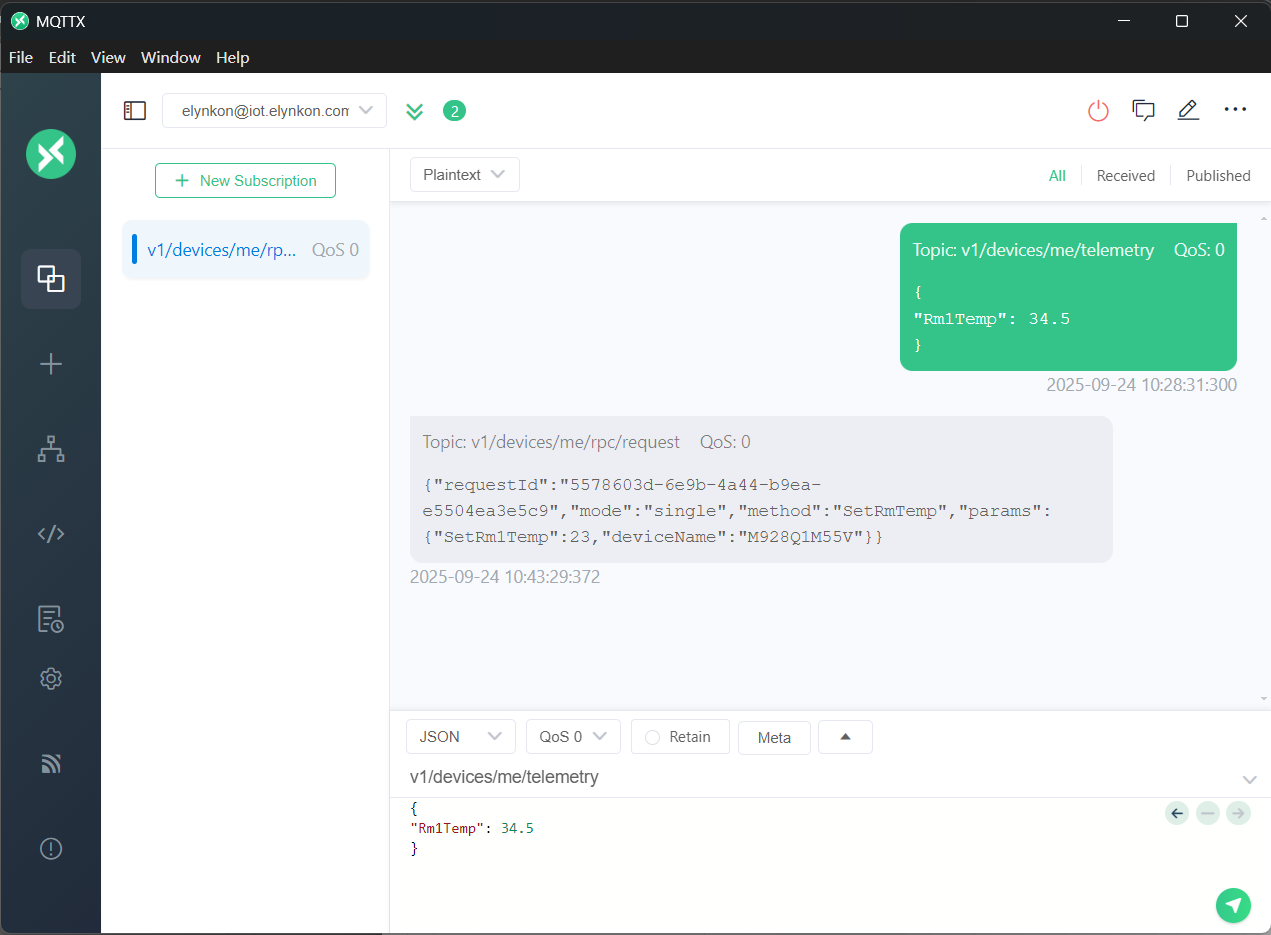
On MQTTX, you can subscribe to the topic "v1/devices/me/rpc/request/+".
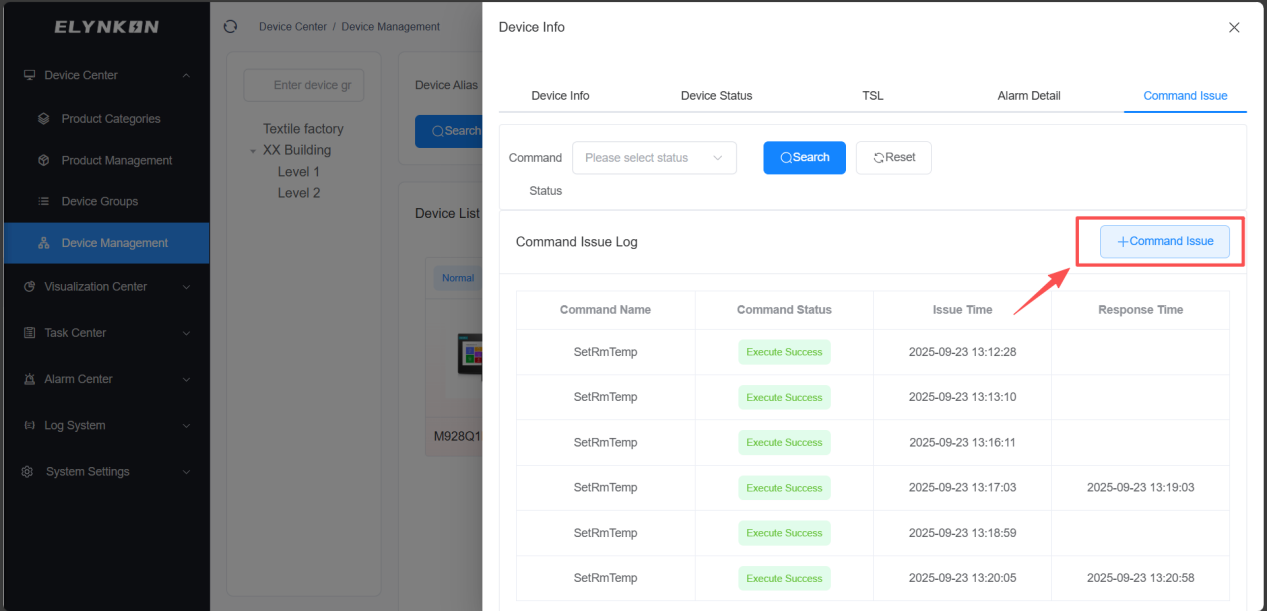
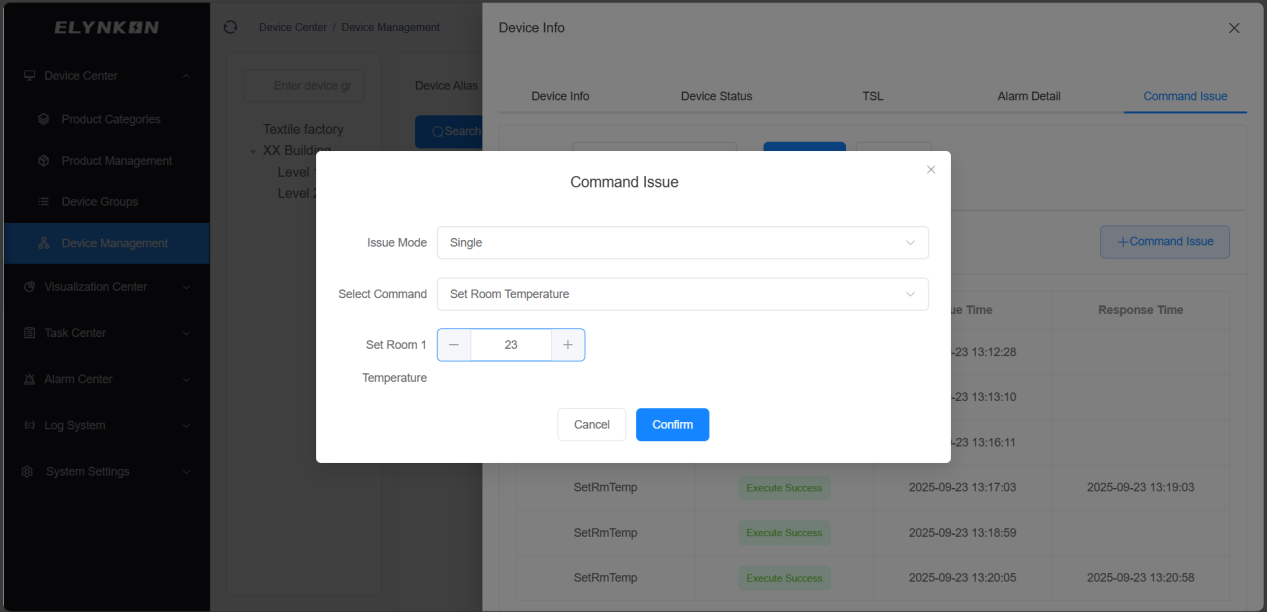
In the Command Issue Page of the corresponding device on the platform, click the "Command Issue" button.
Take single mode as an example: select the Command Service created in the previous steps and enter a value. For example, if you need to adjust the set temperature of Room 1 to 23°C, simply enter the value "23".
In MQTTX, you can receive the data sent by the platform by subscribing to the Command topic.
v1/devices/me/rpc/request{
"requestId": "5578603d-6e9b-4a44-b9ea-e5504ea3e5c9",
"mode": "single",
"method": "SetRmTemp",
"params": {
"SetRm1Temp": 23,
"deviceName": "M928Q1M55V"
}
}
For more detailed information of the data reporting structure, refer to Section 4.3.4 MQTT Data Reporting Structure Based on the Thing Model.